



If you’ve been playing with AI music tools lately, here’s some genuinely good news.
Heartmula has released an open-source AI music foundation model that’s surprisingly close to what tools like Suno AI can do but with a very different philosophy. It gives you something many creators actually want: full control.
With this model, you can generate music directly on your own PC, offline, with no usage limits. What you run, you own & once it’s set up, you can generate as much music as your hardware allows.
In this guide, I’ll show you exactly how to run Heartmula on your PC, step by step, without skipping the confusing parts.
Before we get into the setup, let’s quickly look at what this model can do and why it’s worth trying in the first place.
Demo of HeartMula
Below is the demo video of HeartMula music model showcasing some of its music generations in different styles & languages.
Features of HeartMula
| Feature | What It Does | Why It Matters |
|---|---|---|
| Open-Source (Apache 2.0) | Fully open code and model weights | Open-Source Freedom: No subscriptions |
| Suno-Style Music Scripting | Supports [Verse], [Chorus], [Bridge], etc. | Structure Control: Custom songs generation |
| 12.5 Hz HeartCodec | Ultra-efficient audio encoding & decoding | High Fidelity: Pro-level sound on consumer GPUs |
| ComfyUI Integration | Visual node-based workflow | Creator Friendly: No scripts, easy experimentation |
| Full-Length Music Output | Generates tracks up to ~6 minutes | Long-Form Ready: Songs, not just short clips |
| Multilingual Engine | Supports EN, ZH, JP, KR, ES | Global Reach: Localized music & ads |
| Expressive Vocal Control | Lyrics formatting affects vocal style | More Emotion: Singing, spoken, and hybrid vocals |
| HeartTranscriptor | Whisper-tuned audio-to-text model | Sync-Ready: Lyrics, subtitles, karaoke |
| Local & Offline Execution | Runs 100% on your PC | Data Sovereignty: Prompts never leave your system |
| VRAM-Optimized Loading | Lazy loading + BF16 pipeline | Accessible Power: Works on 12–16 GB GPUs |
Before You Start
To keep things simple, this guide assumes you’re using ComfyUI’s portable Windows build. If you’re new to ComfyUI, this is the easiest and safest way to get started.
Recommended ComfyUI Version (Windows)
- ComfyUI_windows_portable_nvidia_cu126.7z (Recommended)
- ComfyUI_windows_portable_nvidia_cu128.7z (only if your GPU + drivers fully support CUDA 12.8)
Why CU126?
It’s more widely compatible and tends to be more stable with custom nodes and AI audio models right now.
Minimum System Requirements
GPU: NVIDIA GPU
- VRAM:
- 12 GB minimum
- 16 GB recommended (best audio quality)
- Enough disk space for model downloads
If ComfyUI runs on your system, you’re good to continue.
Check if Hugging Face CLI Is Installed
HeartMuLa uses Hugging Face to download model files.
- Open Command Prompt or Terminal
- Navigate to your ComfyUI folder
- Run one of the following commands:
hf --help
or
huggingface-cli --help
What to expect:
- If you see a list of commands → you’re ready
- If you see
command not found→ install it
Install Hugging Face CLI (If Needed)
Run this inside the same Python environment ComfyUI uses:
pip install huggingface-hub
This ComfyUI workflow and custom node integration was created by Benji, and it’s an excellent contribution to the open-source community. His work makes it possible to run HeartMuLa directly inside ComfyUI with a clean, minimal workflow. We’ll use Benji’s HeartMuLa ComfyUI workflow to install and run HeartMuLa locally.
Step 1: Install HeartMuLa ComfyUI Custom Nodes
HeartMuLa uses custom nodes in ComfyUI for music generation and lyrics/audio transcription. Follow these steps:
- Open Command Prompt and navigate to your ComfyUI folder and in address bar, type cmd and hit enter then in command prompt type:
cd custom_nodes
- Download the custom nodes from GitHub:
git clone https://github.com/benjiyaya/HeartMuLa_ComfyUI
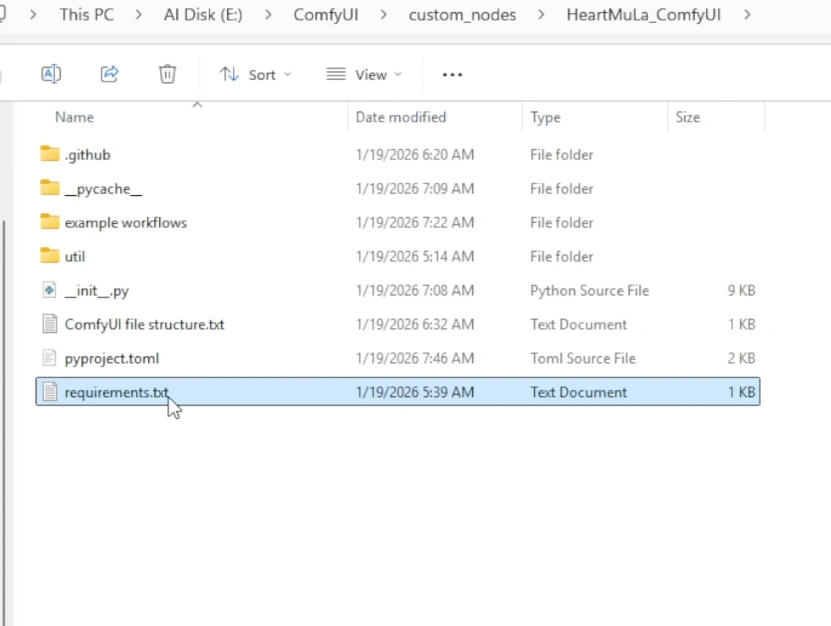
- Install the required Python dependencies:
- Stay in custom_nodes folder and run:
..\..\python_embeded\python.exe -m pip install -r .\HeartMuLa_ComfyUI\requirements.txt
This ensures all the libraries needed for HeartMuLa nodes are installed in your ComfyUI environment.
- Check that everything is ready
- Start ComfyUI by simply double-clicking the file named:
run_nvidia_gpu.bat - Look for messages confirming the custom nodes loaded successfully
File Structure
ComfyUI/custom_nodes/HeartMuLa_ComfyUI/
├── init.py <– The code provided below
├── util/ <– Create this folder
│ └── heartlib/ <– Paste the heartlib SOURCE CODE here
│ ├── init.py
│ ├── pipelines.py
│ ├── models.py
│ └── … (other python files)
└── requirements.txt (Optional: torch, transformers, torchaudio, etc.)
You’re now ready for Step 2
Step 2: Download the HeartMuLa Model Files.
HeartMuLa has multiple model components: the music generator, 3B model, codec, and transcriptor. We’ll use the Hugging Face CLI to download them directly into the correct folder.
1. Go to your ComfyUI models folder
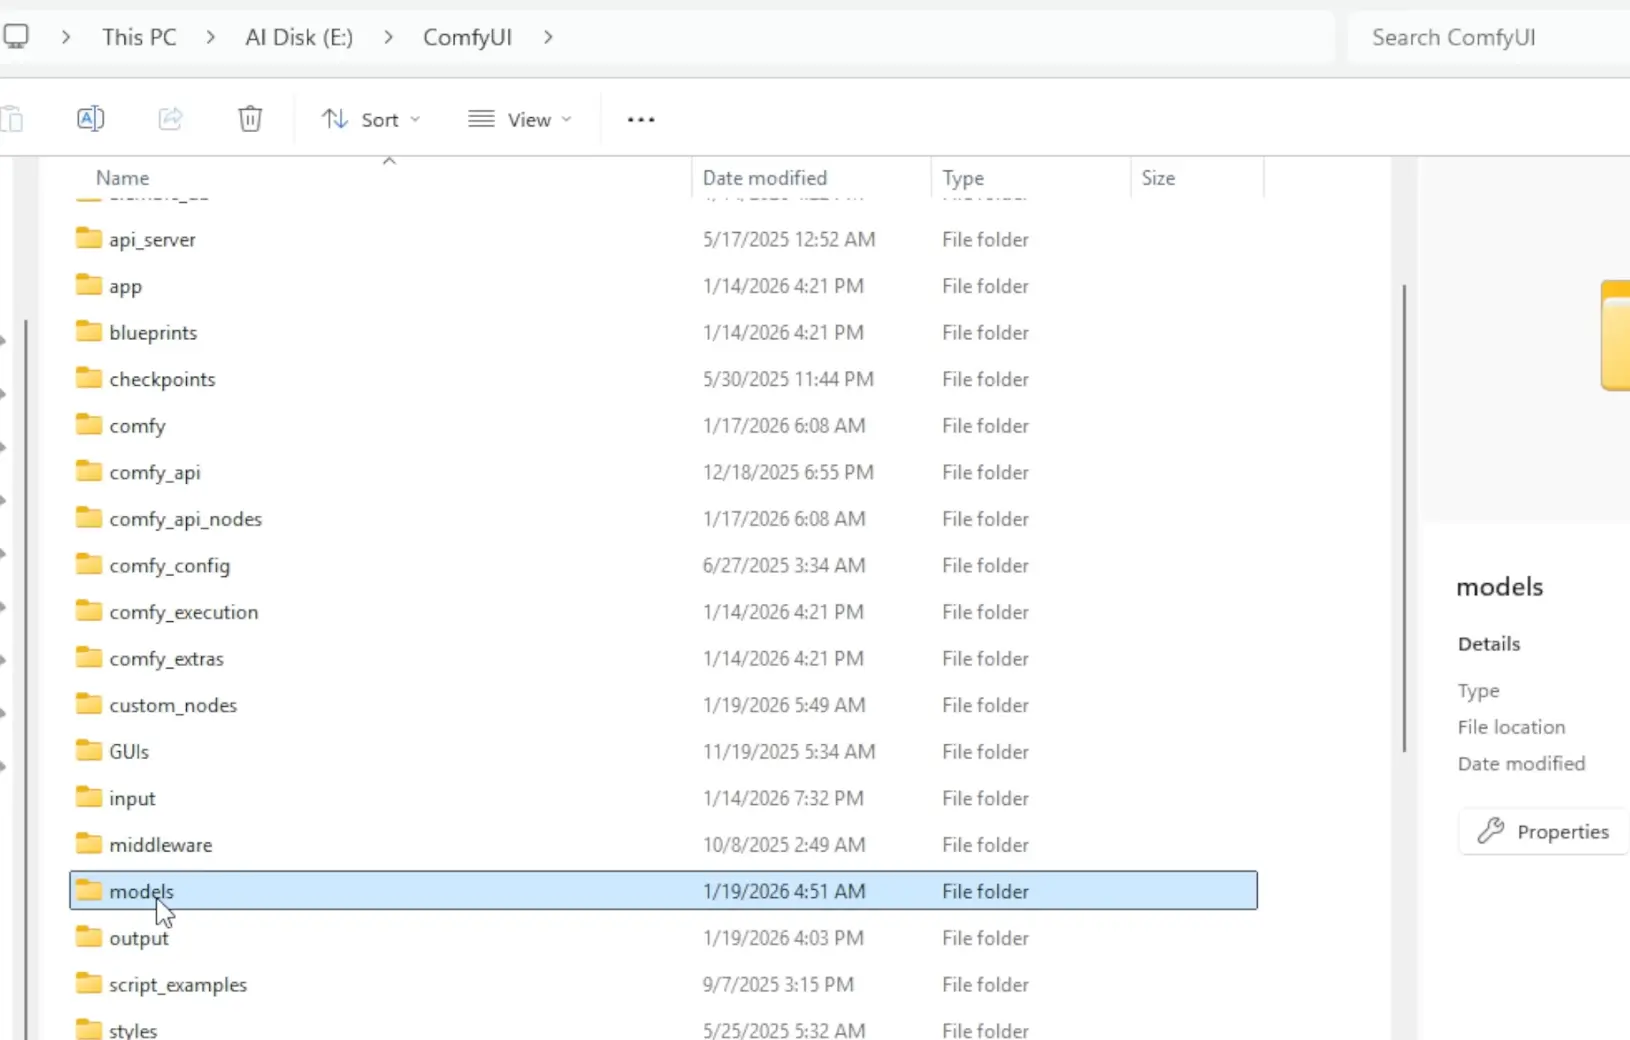
ComfyUI\models
2. Look for HeartMuLa folder, if it doesn’t exist, you can create it:
Create a folder namedHeartMuLa & don’t open it yet.
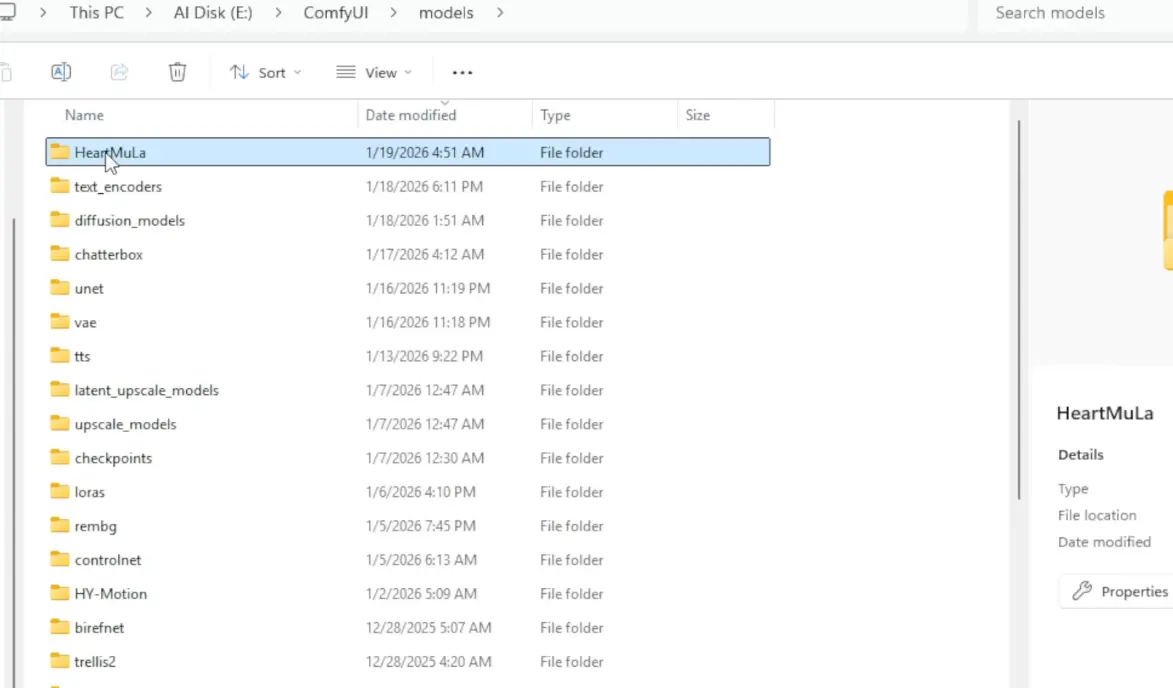
3. Download the model files using Hugging Face CLI
Open Cmd & Run these commands one by one:
hf download HeartMuLa/HeartMuLaGen --local-dir ./HeartMuLa
hf download HeartMuLa/HeartMuLa-oss-3B --local-dir ./HeartMuLa/HeartMuLa-oss-3B
hf download HeartMuLa/HeartCodec-oss --local-dir ./HeartMuLa/HeartCodec-oss
hf download HeartMuLa/HeartTranscriptor-oss --local-dir ./HeartMuLa/HeartTranscriptor-oss
These commands will automatically place the files into the correct subfolders inside ComfyUI\models\HeartMuLa. Below is how the HeartMula folder should look like:
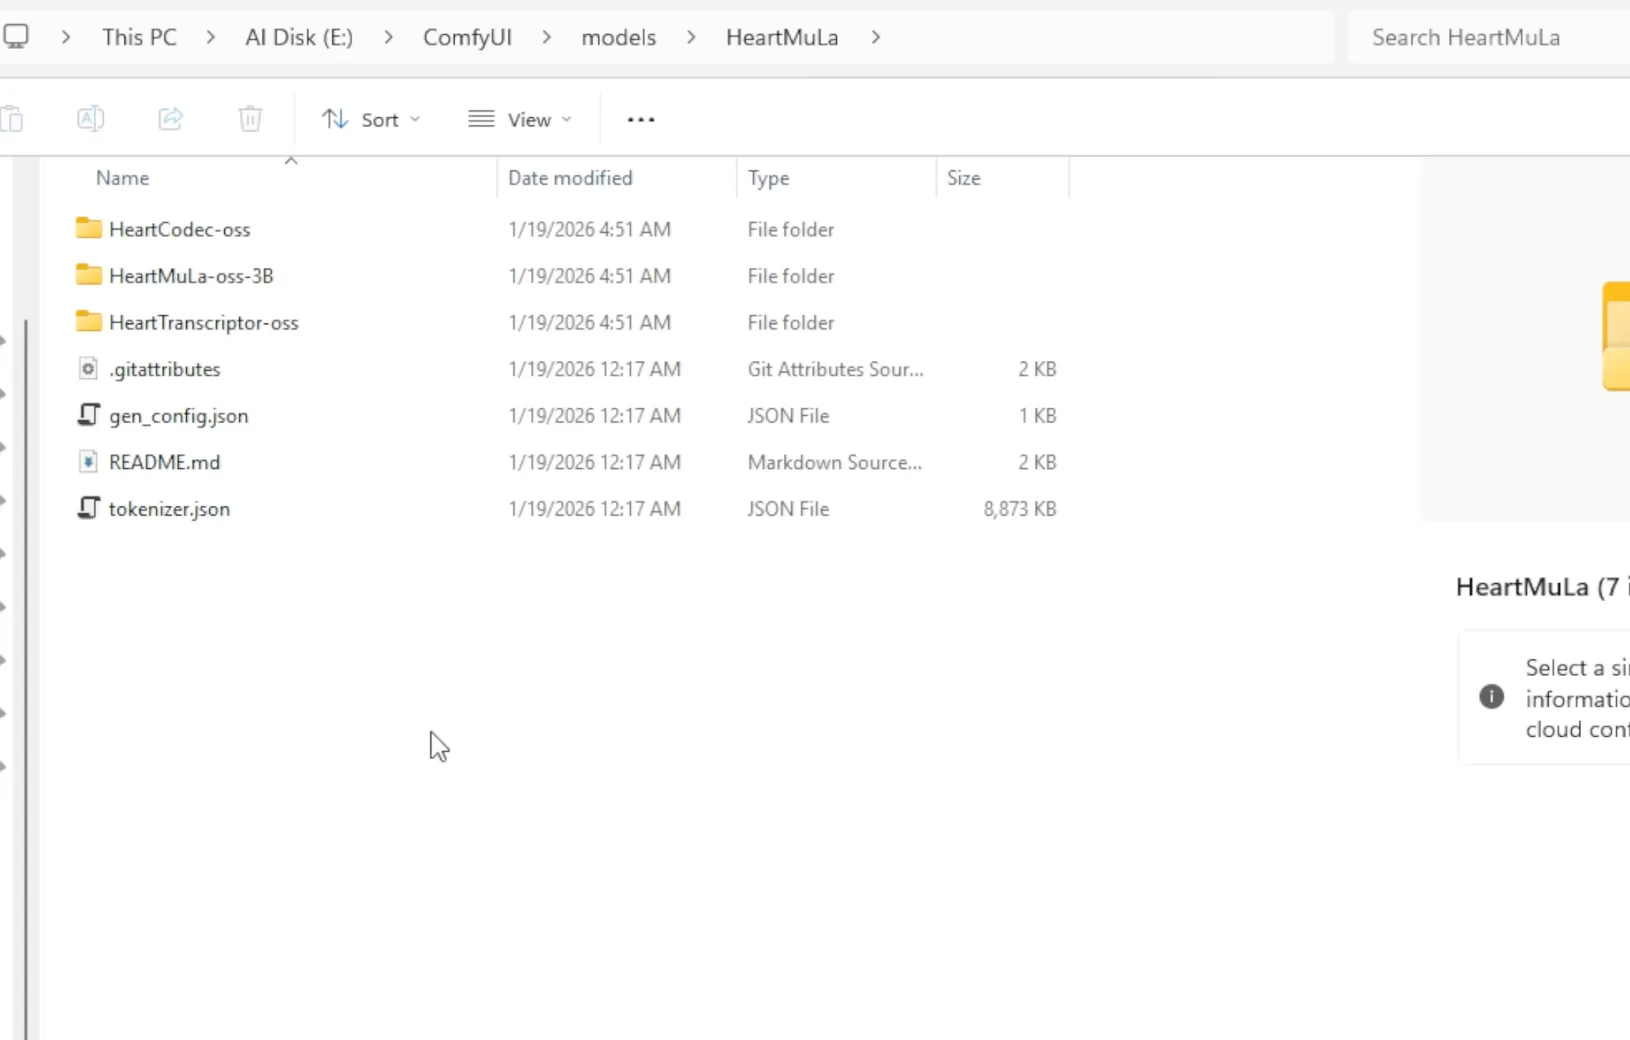
Step 3: Verify the folder structure
ComfyUI
└── models
    └── HeartMuLa
        ├── HeartMuLa-oss-3B
        ├── HeartCodec-oss
        ├── HeartTranscriptor-oss
        └── gen_config.json
        └── tokenizer.json
This structure is required for the custom nodes to find the models correctly.
Tip
- If your GPU has 12 GB VRAM, lazy loading will help manage memory.
- The 7B model isn’t released yet — stick with 3B for now.
Also Read: Forget AI Videos Yume 1.5 Creates Interactive AI Worlds on Your PC
Step 4: Run Your First Music Generation in ComfyUI
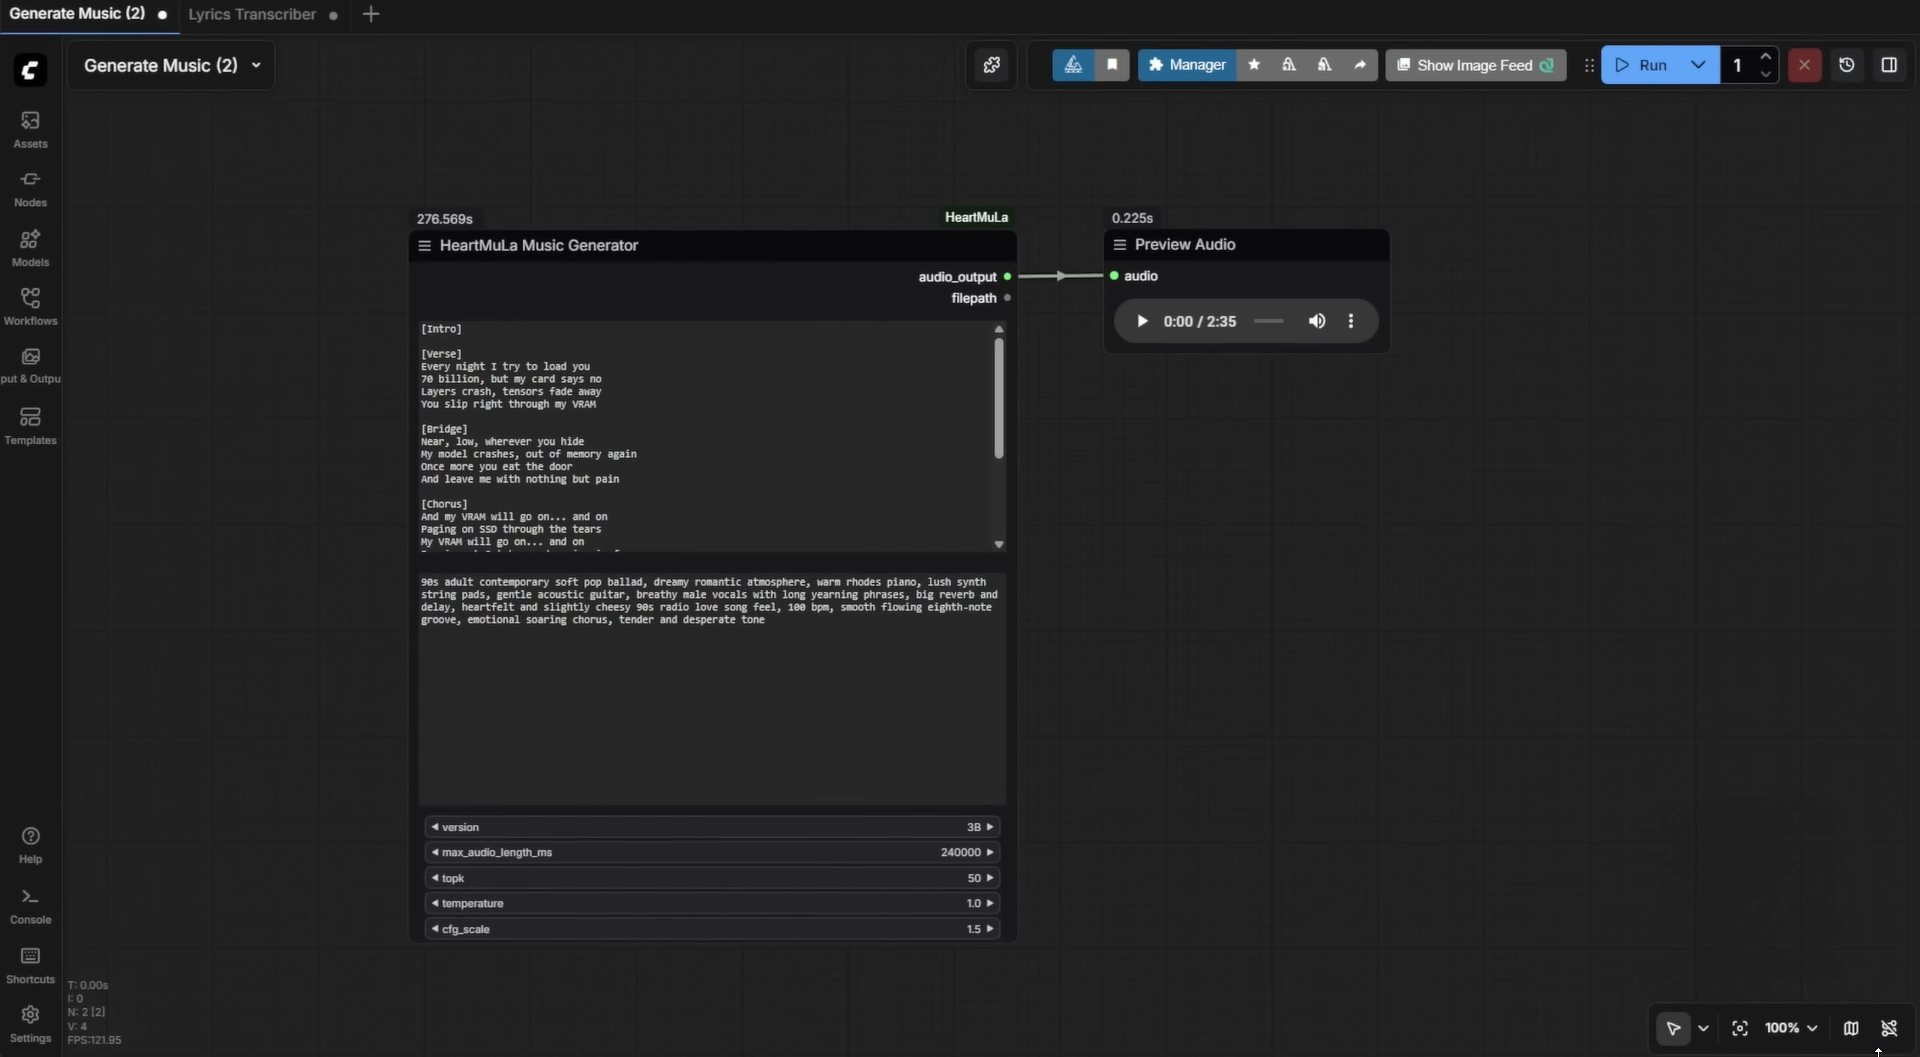
- Run ComfyUI
- In the HeartMuLa custom nodes folder, you’ll find example workflows:
Generate Music.json→ Music generationLyrics Transcriber.json→ Audio-to-text transcription
- Drag & drop the workflow into ComfyUI.
- For music generation:
- In the lyrics node, type your lyrics
- Below it, type music styles as keywords/tags (
piano,happy,wedding) - Adjust any settings you want and run → enjoy your generated song
- For lyrics transcription:
- Import
Lyrics Transcriber.json - Load any audio into the input node
- Run → get a transcribed text output
- Import
That’s it! play around with the nodes, tweak lyrics or styles, and see what your AI can create!
Also Read: Run TRELLIS 2 Locally: Generate High-Quality 3D Models from Images
Need Help or Have Questions?
If you run into any issues, get stuck, or just want tips on better results, drop a comment below
I’ll do my best to help you out.
Wrapping Up
HeartMuLa brings Suno-style AI music generation fully offline, open-source, and ComfyUI-friendly. With portable ComfyUI, drag-and-drop workflows, and simple lyric + style inputs, you can go from idea to full track in minutes.
Install it once, experiment freely, tweak the settings, and let the model do the heavy lifting
If this guide helped you, try pushing the limits, different genres, structures, and languages.
Happy creating!!